Modern Fan Installation Made Simple: Tools, Wiring, and Expert Tips
Ceiling fans are one of the most energy-efficient ways to cool a room, and installing one yourself can save you a good amount of money.
Introduction
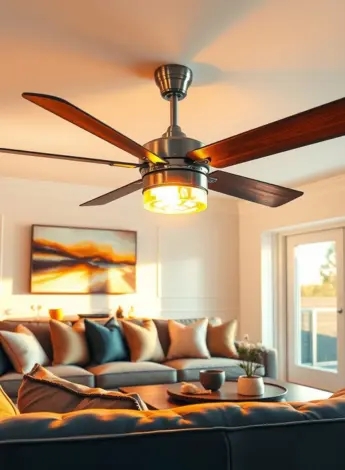
A stylish and efficient ceiling fan can make a world of difference in your home, providing better airflow, energy savings, and a modern touch to your décor. If you're looking for a reliable brand, Harbor Breeze fans are a great choice. Known for their sleek designs, quiet operation, and easy installation, these fans are perfect for both beginners and experienced DIYers. Installing a modern ceiling fan may seem like a daunting task, but with the right tools, wiring knowledge, and expert tips, you can handle the job yourself and save on professional installation costs.
Why Install a Ceiling Fan Yourself?
Ceiling fans are one of the most energy-efficient ways to cool a room, and installing one yourself can save you a good amount of money. Hiring an electrician can cost between $100 to $300, depending on the complexity of the job. But with a little patience and the right guidance, you can successfully install a modern ceiling fan without professional help.
Tools You’ll Need for Installation
Before you begin, gather the necessary tools to make the installation smooth and hassle-free:
✔ Screwdriver (Phillips and flathead) – For securing screws and brackets.
✔ Voltage tester – To ensure the power is off before working with wires.
✔ Drill – If you need to install a new junction box.
✔ Wire connectors – To secure electrical connections.
✔ Electrical tape – For extra safety when securing wires.
✔ Wrench or pliers – To tighten bolts and nuts.
✔ Ladder – To safely reach the ceiling.
✔ Ceiling fan kit – Most modern fans, including Harbor Breeze fans, come with the necessary mounting hardware and instructions.
Having these tools ready will save you time and make the installation process easier.
Step-by-Step Guide to Installing a Modern Ceiling Fan
Step 1: Turn Off the Power
Before doing anything, turn off the power at the circuit breaker. Use a voltage tester to double-check that no electricity is running to the wires. Safety first!
Step 2: Remove the Old Fixture
If you’re replacing an existing light fixture or fan, carefully remove it and disconnect the wires. Take note of the wire colors—they will usually be black (hot), white (neutral), and green or bare copper (ground).
Step 3: Install the Mounting Bracket
Modern fans, including Harbor Breeze ceiling fans, come with a mounting bracket that must be secured to the ceiling junction box. Use a drill or screwdriver to attach it tightly to ensure stability. If your ceiling doesn’t have a junction box, you’ll need to install one before proceeding.
Step 4: Connect the Wiring
Follow the wiring instructions provided with your fan. In most cases:
- Black wire (fan power) connects to the black ceiling wire.
- White wire (neutral) connects to the white ceiling wire.
- Green or copper wire (ground) connects to the green or bare ceiling wire.
Use wire connectors to join the wires and wrap electrical tape around them for extra security. Make sure all connections are tight to avoid any electrical issues later.
Step 5: Attach the Fan Motor
Carefully lift the fan motor and attach it to the mounting bracket. Some Harbor Breeze fans have an easy-install system that allows the motor to hook onto the bracket temporarily while you finish securing the wires. Once in place, tighten all screws to prevent wobbling.
Step 6: Attach the Blades and Light Kit
Secure the fan blades using the provided screws. Some modern fans come with reversible blades, allowing you to switch between two different finishes for added customization. If your fan includes a light kit, follow the instructions to connect the wiring and secure the fixture.
Step 7: Test the Fan
Turn the power back on and test your fan. If it wobbles, use the balancing kit (often included in the package) to stabilize it. If the fan doesn’t turn on, double-check your wiring connections.
Why Choose a Harbor Breeze Ceiling Fan?
If you’re looking for a stylish and energy-efficient fan, Harbor Breeze ceiling fans offer some of the best features:
✔ Remote Control Functionality – Adjust the fan speed and lighting without leaving your seat.
✔ Energy-Efficient LED Lighting – Many Harbor Breeze models come with LED lights that last longer and consume less power.
✔ Reversible Motor – The reverse airflow feature allows you to change the fan direction for summer cooling or winter warmth.
✔ Modern and Sleek Designs – From contemporary brushed nickel to rustic wood finishes, Harbor Breeze fans fit any home style.
✔ Quiet Operation – The high-quality motors are designed for silent and smooth performance.
These features make Harbor Breeze fans a top choice for homeowners looking for both function and aesthetics.
Expert Tips for a Smooth Installation
✅ Check Ceiling Height – Make sure you have enough clearance for proper airflow. If your ceiling is low, consider a flush-mount fan.
✅ Use a Stud Finder – If installing a new junction box, secure it to a ceiling joist for added stability.
✅ Balance the Blades – If your fan wobbles, use the included balancing kit to adjust the weight distribution.
✅ Install a Wall Switch or Remote – Many modern fans, including Harbor Breeze models, come with remote controls for easy operation.
✅ Choose the Right Fan Size – A 52-inch fan is ideal for medium to large rooms, while smaller fans (36-42 inches) work best in compact spaces.
Final Thoughts
Installing a modern ceiling fan doesn’t have to be complicated. With the right tools, proper wiring, and expert tips, you can complete the installation yourself and save money on labor costs. Harbor Breeze ceiling fans are a fantastic option, offering stylish designs, energy efficiency, and user-friendly installation.
So why wait? Grab your tools, follow these steps, and enjoy the comfort and style of a brand-new modern ceiling fan in your home! ????
What's Your Reaction?


.jpg)
